Private: Blog Posts

Phone Repair in Euless Texas

Comprehensive Phone Repair Services in Euless, Texas: What to Expect

Whether it’s a cracked screen, a drained battery, or water damage, phones inevitably encounter issues over time. For residents of Euless, Texas, Slick Phone Repair offers a reliable, high-quality solution for these common problems and more. Since our establishment in 2020, we’ve served the Euless community with expert repair services for phones, tablets, laptops, and even game consoles. Here’s a closer look at the full range of services we offer and why Slick Phone Repair is the go-to choice for comprehensive device care. Types of Repairs: What We Fix At Slick Phone Repair, our certified technicians are skilled in addressing a wide variety of device issues. Here are some of the core services we offer: How Repairs Are Handled: Our Process We believe in transparency and quality at every step of the repair process: Time and Cost Expectations: Efficient, Affordable Repairs We know how important it is to have a working phone, which is why we prioritize quick and efficient service: What Makes Slick Phone Repair Unique in Euless Slick Phone Repair is committed to providing exceptional service that sets us apart from the competition. Here’s what makes us the best choice for phone repair in Euless, Texas: Ready to Get Started? Visit Slick Phone Repair Today! If you’re in need of a phone repair in Euless, Texas, look no further than Slick Phone Repair. From minor fixes to major repairs, our team is here to restore your device with speed, quality, and transparency. Visit us today to experience the difference of professional service backed by certified technicians and premium parts. For more information or to schedule a repair, contact us or stop by our Euless location. We’re here to help you get back to life with a fully functional phone!

Comprehensive Phone Repair Services in Euless, Texas: What to Expect Read More »

iPhone 13 pro sim replacement

iPhone 13 Pro SIM Card Tray Replacement

The iPhone 13 Pro is known for its robust features and excellent performance. An essential component that often goes unnoticed is the SIM card tray, which plays a critical role in mobile connectivity. Understanding how to replace this component can save time and ensure your device remains functional. Recognizing SIM Card Tray Issues A damaged SIM card tray can manifest through various symptoms like difficulty in ejecting the tray, improper fitting, or the phone failing to detect the SIM card. Recognizing these signs early can prevent further complications. Preparing for SIM Card Tray ReplacementBefore you start the replacement process, gather necessary tools such as a SIM card ejector pin, a clean workspace, and possibly fine tweezers. Ensure your iPhone is powered off to avoid any electrical issues during the process. Purchasing the Right SIM Card TraySelecting the correct SIM card tray for your iPhone 13 Pro is crucial. Ensure compatibility and quality by purchasing from reputable sources, either online or at a certified Apple store. Step-by-Step Guide to Replacing the SIM Card Tray Powering Off the iPhone 13 ProEnsure your device is completely powered off. Removing the Existing SIM Card TrayCarefully insert the ejector pin into the hole beside the tray. Apply gentle pressure until the tray pops out. Remove it gently from the slot. Installing the New SIM Card TrayPlace the new SIM card into the tray, ensuring it fits perfectly without forcing it. Align the tray with the slot and gently push it back into the phone. Make sure it is flush with the phone’s body. Troubleshooting Common Issues After ReplacementIf your iPhone does not recognize the SIM card, ensure the card is properly aligned and clean. Check for any visible damage to the tray or the card. Maintaining Your iPhone’s SIM Card TrayRegular maintenance includes keeping the tray and its slot clean from dust and debris. Avoid opening the tray unnecessarily to reduce wear and tear. Professional Help for SIM Card Tray ReplacementIf you’re uncomfortable performing the replacement yourself, consider seeking help from a professional technician. This ensures the job is done correctly and without damage to your device. Conclusion Replacing the SIM card tray in your iPhone 13 Pro is a straightforward process that can be accomplished with some basic tools and careful handling. By following this guide, you can ensure continuous functionality and connectivity of your iPhone. FAQs- iPhone 13 Sim Tray Replacement Also Read: iPad 10 Battery Replacement: Everything You Need to Know iPhone 14 Screen Replacement: A Comprehensive Guide

iPhone 13 Pro SIM Card Tray Replacement Read More »

iPad 10 battery replacement

iPad 10 Battery Replacement: Everything You Need to Know

In this digital age, where our lives are increasingly intertwined with technology, having a fully functional device is paramount. Among the essential components of any electronic gadget, the battery reigns supreme, providing the lifeblood necessary to keep our devices running smoothly. When it comes to the iPad 10, a device cherished for its versatility and portability, ensuring a healthy battery is crucial for uninterrupted usage. Understanding iPad 10 Battery Life The lifespan of an iPad 10 battery depends on various factors, including usage patterns, environmental conditions, and overall maintenance. Typically, these lithium-ion batteries are designed to retain up to 80% of their original capacity after 500 complete charge cycles, which translates to several years of usage under normal conditions. Signs of a Deteriorating Battery As with any rechargeable battery, the iPad 10’s power source is subject to wear and tear over time. Common signs of a deteriorating battery include rapid depletion of charge, sudden shutdowns even when the battery indicator shows remaining power, and noticeable swelling of the battery itself. If you notice any of these symptoms, it may be time to consider a replacement. Cost of iPad 10 Battery Replacement The cost of replacing an iPad 10 battery varies depending on several factors, including the model of the iPad, the severity of the battery degradation, and whether you opt for a DIY approach or professional service. On average, a battery replacement can range from $100 to $200, although prices may fluctuate based on market demand and availability. DIY vs. Professional Replacement While some tech-savvy individuals may be tempted to tackle battery replacement themselves, it’s essential to weigh the risks and benefits carefully. DIY battery replacement kits are available online, but improper installation can lead to further damage or even pose safety hazards. Professional service ensures expertise and warranty coverage, offering peace of mind and guaranteeing a job well done. Process of iPad 10 Battery Replacement For those considering a DIY approach, the process of replacing an iPad 10 battery involves carefully disassembling the device, removing the old battery, and installing the new one following precise instructions. It’s crucial to exercise caution and attention to detail throughout the procedure to avoid damaging delicate components. Choosing the Right Replacement Battery When selecting a replacement battery for your iPad 10, compatibility is key. Ensure that the battery is specifically designed for your iPad model to prevent compatibility issues or potential damage. Additionally, prioritize quality and reliability to ensure optimal performance and longevity. Tips for Extending iPad 10 Battery Life To prolong the lifespan of your iPad 10 battery, adopt habits that promote efficient power usage. This includes adjusting screen brightness, disabling unnecessary background apps, and avoiding extreme temperatures that can adversely affect battery performance. Regularly updating software and performing periodic maintenance checks can also help preserve battery health. Is It Worth Replacing an iPad 10 Battery? The decision to replace an iPad 10 battery ultimately depends on various factors, including the age and overall condition of the device, the cost of replacement, and your personal usage requirements. For users who rely heavily on their iPads for work or entertainment, investing in a new battery can breathe new life into an otherwise functional device and prolong its usefulness for years to come. Customer Satisfaction and Reviews Many users who have undergone iPad 10 battery replacement have reported significant improvements in device performance and overall satisfaction. By addressing battery issues promptly, they have been able to continue enjoying the full capabilities of their iPads without interruption, reaffirming the value of investing in quality battery replacement services. Conclusion In conclusion, ensuring a healthy battery is essential for maximizing the utility and longevity of your iPad 10. By understanding the factors influencing battery life, recognizing signs of deterioration, and exploring replacement options, you can make informed decisions to keep your device running smoothly for years to come. FAQs: iPad 10 Battery Replacement Also Read: iPhone 14 Screen Replacement: A Comprehensive Guide Should you repair or replace your smart device? How to Stop Your Phone from Turning Off by Itself

iPad 10 Battery Replacement: Everything You Need to Know Read More »

iPhone 14 screen replacement

iPhone 14 Screen Replacement: A Comprehensive Guide

The screen of your iPhone 14 is not just a window to your digital world; it’s the interface through which you interact with your device daily. Whether it’s browsing through social media, sending messages, or watching videos, a functional screen is essential for a seamless user experience. However, accidents happen, and screens can get damaged or malfunction over time. In this guide, we’ll delve into the world of iPhone 14 screen replacement, exploring the options available, costs involved, and steps for DIY enthusiasts. Understanding iPhone 14 Screen Before diving into the replacement process, it’s crucial to understand the intricacies of the iPhone 14 screen. Apple’s latest flagship boasts a stunning OLED display with vibrant colors and crisp details. However, despite its durability, the screen is susceptible to damage from drops, impacts, or exposure to water. Common screen issues include cracks, dead pixels, and unresponsive touch functionality. Signs That Indicate Screen Replacement So, how do you know when it’s time to replace your iPhone 14 screen? Keep an eye out for telltale signs such as visible cracks, lines, or distortions on the display. Additionally, if your screen becomes unresponsive to touch gestures or exhibits erratic behavior, it may indicate underlying issues that warrant replacement. Options for iPhone 14 Screen Replacement When faced with a damaged screen, you have several options for replacement. You can opt for an Apple Authorized Service Provider (AASP), visit a third-party repair shop, or take the DIY route using screen replacement kits available online. Pros and Cons of Each Option Each replacement option comes with its own set of pros and cons. AASPs offer genuine Apple parts and skilled technicians but may come with a higher price tag. Third-party repair shops may offer more competitive pricing but may use aftermarket parts of varying quality. DIY replacement kits provide flexibility and cost savings but require technical expertise and come with risks. Cost of iPhone 14 Screen Replacement The cost of replacing an iPhone 14 screen can vary depending on the chosen option and the extent of damage. On average, AASP repairs may range from $200 to $400, while third-party repair shops may offer more affordable options starting from $100. DIY kits can cost as low as $50, but keep in mind the potential risks involved. Steps for DIY iPhone 14 Screen Replacement For those brave enough to tackle the replacement themselves, here’s a brief overview of the process. You’ll need specialized tools such as a pentalobe screwdriver, suction cup, and spudger. Start by powering off your device and carefully removing the screen assembly, followed by transferring components to the new screen and reassembling the device. Precautions and Tips DIY screen replacement can be a rewarding experience, but it’s essential to take proper precautions to avoid causing further damage to your device. Ensure you’re working in a clean, well-lit environment and follow step-by-step guides meticulously. Take your time and don’t rush the process to minimize the risk of errors. Warranty and Aftercare Before proceeding with any replacement option, consider the implications for your device warranty. Apple’s warranty may be voided if the screen is replaced by a non-certified technician or with unauthorized parts. Additionally, aftercare is crucial to maintain the longevity of your new screen. Invest in a protective case and screen protector to minimize future damage. Conclusion In conclusion, an iPhone 14 screen replacement is a viable solution for restoring functionality to your device after damage or malfunction. Whether you choose to entrust the task to professionals or embark on a DIY adventure, weigh the pros and cons carefully to make an informed decision. Remember to prioritize safety and quality to ensure a satisfactory outcome. Frequently Asked Questions (FAQs) Also Read: Samsung Repair in Euless: Your Go-To Guide How To Show Battery Percentage On iPhone 12 How to Put an iPhone Into Recovery Mode

iPhone 14 Screen Replacement: A Comprehensive Guide Read More »

Should you repair or replace your smart device

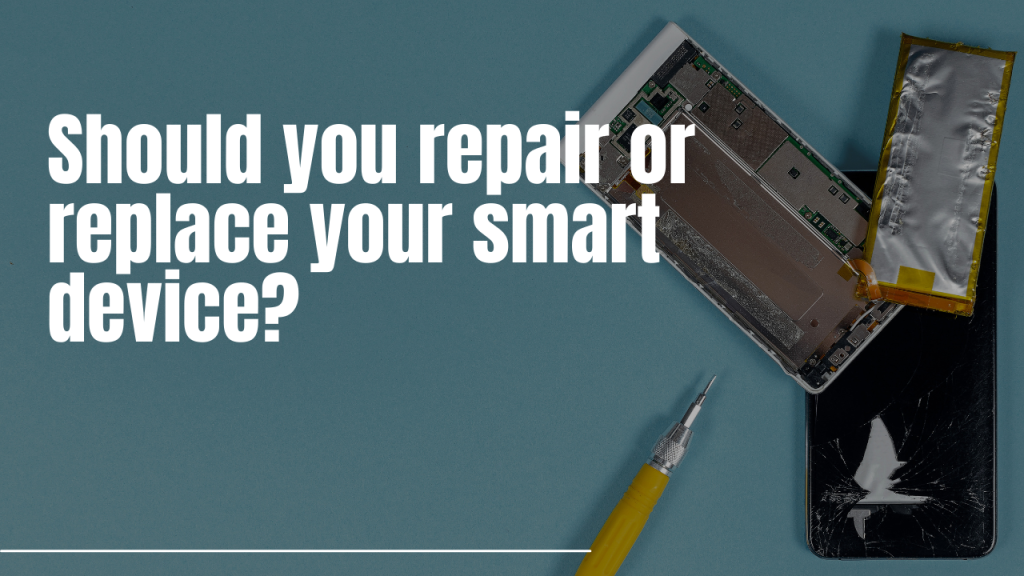
Should you repair or replace your smart device?

In a world where technology is constantly evolving, our dependency on smart devices has become more than ever. From smartphones to tablets and everything in between, these gadgets have seamlessly integrated into our daily lives, making tasks easier and connecting us to the world.  Let’s say you broke your phone, and you have so much information which are not backed up to your cloud or anywhere else. So, what would you do in this case?  So, in this article, we will walk you through if you should fix it or get another one. We suggest checking how bad the damage is. If it’s just the screen, fixing it will be cheaper than buying a new phone. So, think about what works best for you. Next, think about money. Fixing your phone or any device usually costs less than getting a new one. But if you need to replace the whole thing, it can get pricey. Now, consider how old your device is. Tech is always changing, and older devices might feel outdated. Sometimes, you need to upgrade to keep up. Repairing can take you some time, but it won’t last forever. But what about the time you’ll be without your device? You might worry that repairs take too long. But many repair shops can fix things up pretty fast these days, so don’t stress too much. Taking your device to a professional can work wonders. Why spend more money on something new when it can be fixed for less? It’s worth thinking about. So, what’s the final call? Fixing your device is usually cheaper and keeps you from having to get used to something new. But a new device can give you some extra features. A good repair expert can make your device feel brand new, saving you from buying a replacement. In the end, it’s your call. But if you ask us, repairing is often the smarter choice. In summary, we all rely on our smart devices every day. A broken one can mess up your routine. But we think repairing is usually the better way to go. So, if you’re in Euless, Texas, or Bedford Texas, check out Slick Phone Repair for affordable fixes on cellphones, tablets, and PCs. We hope this article makes your work easier on what do to if your phone break.

Should you repair or replace your smart device? Read More »

How to Stop Your Phone from Turning Off by Itself
How to Stop Your Phone from Turning Off by Itself
Is your phone mysteriously powering down without any warning? Dealing with a phone that shuts off unexpectedly can be frustrating and disruptive. But fear not, as there are several steps you can take to troubleshoot and resolve this issue. In this guide, we’ll walk you through the process of identifying the root cause of your phone’s automatic shutdowns and provide practical solutions to prevent them from happening again. Understanding the Problem Phones turning off by themselves can be caused by various factors, including software glitches, battery issues, problematic apps, malware, hardware malfunctions, environmental factors, and more. Understanding the underlying cause is crucial for effective troubleshooting. Check for Software Updates One of the first steps in addressing unexpected phone shutdowns is to ensure your device’s software is up to date. Manufacturers often release software updates to address bugs and improve system stability. Go to your phone’s settings, check for updates, and install any available patches or updates. Battery Check A deteriorating battery can lead to sudden shutdowns. Check your battery health using built-in diagnostic tools or third-party apps. If your battery is old or damaged, consider replacing it to prevent further issues. App Optimization Some apps may consume excessive resources, leading to performance issues and unexpected shutdowns. Identify and uninstall or disable apps that are draining your battery or causing your phone to overheat. Check for Malware Malware infections can disrupt your phone’s normal operation and cause it to shut down unexpectedly. Install reputable antivirus software and perform a full scan of your device to detect and remove any malicious software. Hardware Inspection Inspect your phone’s hardware components for any signs of damage or malfunction. Pay attention to the battery, charging port, and power button. If you notice any issues, such as swelling batteries or loose connections, seek professional assistance for repairs or replacement. Temperature and Environment Extreme temperatures can affect your phone’s performance and battery life. Avoid exposing your device to high temperatures or direct sunlight for prolonged periods. Similarly, protect your phone from extreme cold and humidity, which can also impact its functionality. Power Settings Optimize your phone’s power settings to extend battery life and prevent overheating. Adjust screen brightness, enable power-saving modes, and limit background processes to conserve energy and reduce the likelihood of unexpected shutdowns. Disable Unnecessary features Turn off unnecessary features and services that you’re not using, such as GPS, Bluetooth, and Wi-Fi scanning. These features can drain your battery and contribute to performance issues, especially if they’re constantly active in the background. Resetting Device Settings If you’ve tried everything else and your phone is still experiencing frequent shutdowns, consider resetting your device to its factory settings. This will erase all data and settings, so make sure to back up your important files before proceeding. Factory resets can often resolve stubborn software issues and restore your phone to optimal performance. Seek Professional Help If you’ve exhausted all troubleshooting steps and your phone continues to turn off unexpectedly, it may be time to seek professional assistance. Contact your device manufacturer, carrier, or a qualified technician for further diagnosis and repair. Preventive Measures To prevent future occurrences of unexpected phone shutdowns, adopt good maintenance practices. Regularly update your device’s software, monitor battery health, avoid installing suspicious apps, and protect your phone from physical damage and extreme conditions. Conclusion Dealing with a phone that turns off by itself can be frustrating, but with the right approach, you can identify the underlying cause and take appropriate steps to resolve the issue. By following the tips outlined in this guide and staying proactive about device maintenance, you can ensure a smoother and more reliable mobile experience Also Read: Samsung Repair in Euless: Your Go-To Guide How To Show Battery Percentage On iPhone 12

How to Stop Your Phone from Turning Off by Itself Read More »
Samsung Repair in Euless

Samsung Repair in Euless: Your Go-To Guide

Introduction to Samsung Repair Services in Euless In the heart of Euless, Texas, Samsung users have access to a wide array of professional repair services dedicated to keeping their devices in top-notch condition. Recognizing the importance of reliable repairs, this guide aims to connect you with the best Samsung repair near Euless, Texas, ensuring your device receives the care it deserves. Whether it’s a shattered screen or a battery that won’t hold a charge, knowing where to turn can make all the difference. Finding the Right Samsung Repair Near Euless, Texas Choosing a repair service is more than just a matter of convenience; it’s about quality, reliability, and affordability. When searching for “Samsung repair near Euless, Texas,” consider the repair shop’s reputation, the expertise of its technicians, and the warranties offered on their work. This section highlights the top-rated repair shops that specialize in Samsung devices, providing peace of mind to those in need. Comprehensive Guide to Phone Repair Near Bedford For residents closer to Bedford, the need for reliable phone repair services is equally pressing. This segment explores the range of services offered by local repair shops, emphasizing their role in maintaining the performance and longevity of Samsung devices. From screen replacements to software troubleshooting, these shops offer comprehensive solutions to keep your phone running smoothly. Understanding the Cost of Samsung Phone Screen Repairs One of the most common concerns among Samsung users is the cost of screen repairs. This section delves into the factors that influence repair costs, such as the model of the device and the extent of the damage. It also provides tips on how to secure the best possible deal on screen repairs, ensuring that you don’t overpay for quality service. Why choose Slick Phone Repair in Euless? Local Expertise: Benefit from the specialized knowledge of our technicians who are well-acquainted with the Samsung smartphone landscape, addressing the unique challenges faced by Euless residents. Swift Service: We recognize the urgency of restoring your smartphone to working order. Our efficient repair process ensures quick turnaround times, minimizing disruption to your daily routine. Quality Repairs: Our commitment to excellence is reflected in the quality of our repairs. Using genuine Samsung parts, we ensure your device functions seamlessly, Common Samsung Phone Issues and How to Solve Them From battery issues to cracked screens, this part of the guide addresses common Samsung phone problems and their solutions. It offers insights into when a battery replacement is necessary and the options available for screen repair and replacement, helping you make informed decisions about your device’s maintenance. The Process of Samsung Screen Repair Repairing a Samsung screen involves a series of steps that require precision and expertise. This segment offers a step-by-step guide to the screen repair process, highlighting the differences between DIY and professional repairs. It aims to equip you with the knowledge to decide which option is best for your situation. Tips for Maintaining Your Samsung Device Post-Repair After your Samsung has been repaired, it’s crucial to take steps to prevent future damage. This section provides advice on protecting your screen and ensuring the longevity of your device, including the use of screen protectors and cases, as well as habits to avoid. Conclusion If you’re looking for Samsung repair near Euless, Texas, or phone repair near Bedford, you’ve got great options. You can quickly fix your Samsung phone without spending too much. Local experts are here to help, making sure your phone works perfectly again. So, if your Samsung needs fixing, don’t worry. Help is right around the corner in Euless and Bedford. Also Read: Best iPhone Services in Euless How to Improve Your iPhone’s Battery Life

Samsung Repair in Euless: Your Go-To Guide Read More »

How To Show Battery Percentage On iPhone 12

How To Show Battery Percentage On iPhone 12

Introduction Monitoring the battery percentage on your iPhone 12 is crucial for managing your device’s power effectively. While the iPhone 12 offers impressive battery life, it’s essential to keep track of the remaining charge to avoid unexpected shutdowns. In this guide, we’ll explore various methods to display the battery percentage on your iPhone 12, ensuring you’re always aware of your device’s power status. Default Display Settings: By default, the iPhone 12 does not display the battery percentage in the status bar. Instead, it only shows a graphical representation of the battery icon. While this provides a general idea of the remaining charge, it may not offer the precision some users require. Using Control Center: One of the simplest methods to check your iPhone 12’s battery percentage is by accessing the Control Center. Swipe down from the top-right corner of the screen to reveal the Control Center, where you’ll find the battery percentage prominently displayed at the top-right corner. Adding Battery Percentage to Status Bar: If you prefer to have the battery percentage constantly visible, you can customize the status bar to include it. Navigate to Settings > Battery > Battery Percentage and toggle the switch to enable it. Once enabled, the battery percentage will appear next to the battery icon in the status bar. Utilizing Accessibility Features: For users with visual impairments or those who find it challenging to read small text, the iPhone 12 offers accessibility settings to make the battery percentage more accessible. Go to Settings > Accessibility > Display & Text Size and toggle on “Display Battery Percentage.” This will show the battery percentage next to the battery icon at all times. Checking Battery Usage: To gain deeper insights into your iPhone 12’s battery usage and percentage, navigate to Settings > Battery. Here, you’ll find detailed information about which apps and services are consuming the most battery, allowing you to optimize usage and extend battery life. Using Widgets: Widgets offer a convenient way to view battery percentage directly from the home screen. Long-press on the home screen, tap the “+” icon in the top-left corner, and select the Batteries widget. This widget will display the battery percentage for your iPhone 12 and any connected accessories. Third-Party Apps: Additionally, several third-party apps are available on the App Store specifically designed for monitoring battery health and percentage. These apps often offer advanced features such as battery optimization tips and real-time monitoring. Battery Health: It’s essential to consider battery health when monitoring the battery percentage on your iPhone 12. Over time, the battery’s capacity may diminish, affecting overall performance. Regularly check battery health in Settings > Battery > Battery Health to ensure optimal performance and longevity. Troubleshooting: If you encounter issues with the battery percentage not displaying correctly, try restarting your iPhone 12 or updating to the latest software version. If the problem persists, contact Apple Support for further assistance. Conclusion: Effectively managing your iPhone 12’s battery life starts with monitoring the battery percentage. By following the methods outlined in this guide, you can ensure you always have a clear view of your device’s power status, allowing you to use it confidently throughout the day. Also Read: How to Stop Your Phone from Turning Off by Itself How to Fix iPhone Bluetooth Greyed Out Issue Best iPhone Repair Services in Euless
How To Show Battery Percentage On iPhone 12 Read More »

Phone Turning Off

How to Stop Your Phone from Turning Off by Itself
Phones turning off by themselves can be a frustrating experience, affecting our daily routines and communication. This article delves into why this happens and offers comprehensive solutions. Understanding Why Phones Turn Off Automatically Several factors can cause your phone to shut down unexpectedly, including hardware issues, software glitches, and battery problems. Identifying the root cause is the first step towards a solution. Troubleshooting Steps Initial Checks Check the battery health: A failing battery can cause your phone to turn off unexpectedly. Most phones have built-in diagnostics to check battery health. Ensure software is up to date: Software updates often include fixes for known issues that could be causing your phone to turn off. Hardware Solutions If battery and software checks don’t resolve the issue, the problem might be hardware-related. Inspecting the battery and connections for any signs of damage is crucial. If you’re not comfortable doing this yourself, consider seeking professional repair. Software Solutions A soft reset can resolve many software-related issues without losing your data. For more persistent problems, a factory reset might be necessary. Remember to back up your data first. Preventive Measures Regular updates, optimal battery practices, and avoiding overheating can prevent many issues that lead to phones turning off unexpectedly. Advanced Solutions For persistent problems, booting in Safe Mode or clearing the cache partition can help identify and solve the issue. If these steps don’t help, professional assistance might be necessary. When to Seek Professional Help If your phone continues to turn off after troubleshooting, it might indicate hardware failure. In such cases, professional repair is advisable. Conclusion Persistent issues with phones turning off can be disruptive, but through careful troubleshooting and preventive measures, most problems can be resolved. Don’t hesitate to seek professional help if needed. Also Read: How to Fix iPhone Bluetooth Greyed Out Issue How to Put an iPhone Into Recovery Mode

How to Stop Your Phone from Turning Off by Itself Read More »
iPhone Bluetooth Fix

How to Fix iPhone Bluetooth Greyed Out Issue

Introduction Navigating through the digital era, Bluetooth connectivity stands as a cornerstone of our daily interactions, from streaming audio in our vehicles to exchanging data between devices. Yet, for iPhone users, an all-too-common hurdle emerges when the Bluetooth option grays out, rendering it inaccessible. This guide embarks on a journey to unravel this perplexing issue, offering a beacon of hope with actionable solutions. Understanding the Greyed Out Bluetooth Issue Common Causes Diving into the heart of the matter, the Bluetooth functionality can falter due to:   Software glitches: These are the mischievous gremlins within the iOS, causing unexpected behavior. Hardware problems: Physical damage or malfunctions within the iPhone’s internal components can cripple Bluetooth capabilities. Symptoms of the Problem The telltale signs include:     An unresponsive Bluetooth toggle within settings.     Persistent failure in detecting or connecting to Bluetooth devices. Pre-Troubleshooting Steps Check iOS Updates A fundamental step is to ensure your iPhone’s brain—the iOS—is up to date. Apple’s updates not only imbue your device with new features but also iron out any creases, including those affecting Bluetooth. Verify Bluetooth Settings Sometimes, the simplest solutions stare us in the face. A quick audit of your Bluetooth settings to ensure it’s enabled can sometimes be all it takes to clear the air. Step-by-Step Guide to Fix Bluetooth Greyed Out Issue Restart Your iPhone The age-old adage, “Have you tried turning it off and on again?” holds its ground for good reason. A restart can act as a reset, giving your device a fresh start without tampering with your data. Toggle Airplane Mode This quick flick can sometimes jolt your iPhone’s wireless functionalities back to normality, acting as a soft reset for connectivity issues. Reset Network Settings When gentle nudges don’t do the trick, a more assertive approach might be in order:     Navigate to Settings > General > Reset.     Tap on Reset Network Settings and confirm. This action cleans the slate for all network-related settings, potentially clearing any blockages affecting Bluetooth. Restore iPhone via iTunes As a last resort before seeking professional help, consider restoring your iPhone. This process wipes the slate clean, offering a fresh start. Before proceeding, ensure you’ve backed up your precious data.     Connect your iPhone to a computer and launch iTunes.     Select your device and opt for ‘Restore iPhone’.     Follow the on-screen instructions to complete the process. Advanced Troubleshooting When the above measures fall short, it’s time to bring in the cavalry:  Contact Apple Support: They’re seasoned veterans when it comes to dealing with such anomalies.   Visit an Authorized Apple Service Provider: If hardware is the culprit, professional diagnosis and repair are your best bet. Prevention Tips     Regularly updating your iOS can fend off many software-related issues.     Shielding your iPhone from harsh environments can preserve its hardware integrity. Conclusion When your iPhone’s Bluetooth option fades into the grey zone, it’s not just a minor inconvenience; it’s a blockage in your digital flow. This comprehensive guide serves as your arsenal in reclaiming control, equipped with a variety of strategies from basic troubleshooting to advanced interventions. Should the shadows linger, remember that professional help is just around the corner, ready to restore light to your connectivity woes. Also Read: How to Put an iPhone Into Recovery Mode How to Improve Your iPhone’s Battery Life

How to Fix iPhone Bluetooth Greyed Out Issue Read More »